
Earlier in the month I showed you my gigantic Marilyn Monroe string art piece that sits above my desk. Some of you wrote me and asked how I was able to hang each piece without nailing 65 different holes in the walls to get it right, and I'm here to share it! It was the first time I tried this technique, and it was definitely the easiest picture hanging experience I've ever had. Ever.
I originally came across this awesome tutorial on Celebrate Everyday, who saw it on Pinterest - I'm sure you all have too. So it's been circulating for a while, I shared it with you all (because it's genius!) a while back, and finally got to put it to the test. I needed to hang the 12 tablets that make up Marilyn, which was really intimidating as they needed to line up. Here's a lovely photo run through:

- Hammer a small nail halfway through the end of a ruler (anywhere near the end).
- Make sure it sits half in, half out.
- Use the nail to hold your picture, and float it to the wall.
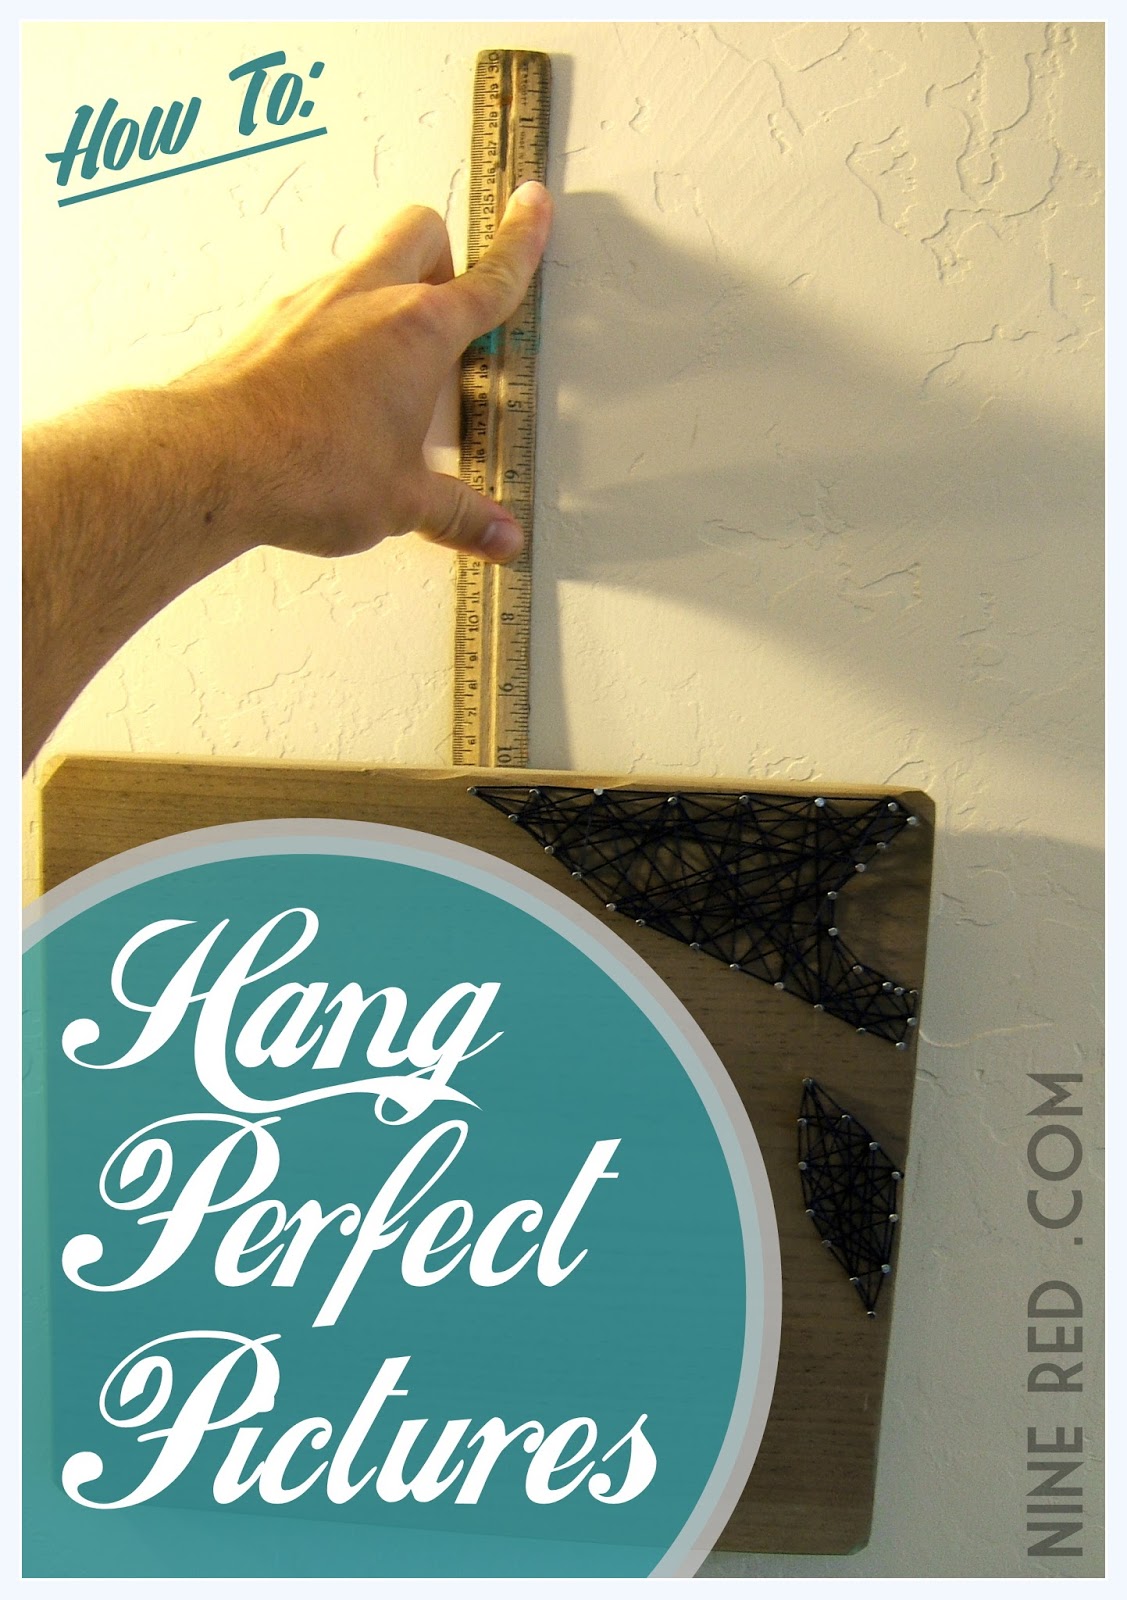
- Line the picture exactly where you want it, and use your free hand to hold the ruler against the wall.
- Remove the photo (while keeping the ruler in place) and push the nail into the wall with your thumb, to make a mark.
- Remove the ruler & don't lose that mark. Circle it in pencil if you need to.
- Hammer a new nail into the mark you made, and put the photo back up. It should hang exactly where you had it before.
- Repeat!
That's it! It really was easy! What I thought would take me hours to do, took about 45 minutes. for 12 tablets. I felt so proud that I didn't have to repeat any, why haven't I tried this before? I rewarded my productivity by not doing anything for the rest of the day. I mean it looked like I did a lot, right? Heh... right. This would be perfect for arranging a gallery wall, especially if you don't have all the pieces collected for your gallery yet. Easy to add onto.
So that's that. We're done. For this post I tried to go more, condensed, Pinterest friendly tutorial style - but if you're the type that likes more details, they are all included - photo by photo - after the break.
Have a wonderful Labor Day weekend everyone!
-Jesse
Linkies: Facebook, Pinterest, Instagram, Twitter, Subscribe & of course, Email me.
Photo by photo tutorial:
1. Hammer a nail halfway through your wooden ruler. Placement doesn't matter, as we're not using the ruler for measurement, it's merely a long flat thing to hold our nail & our picture up. Don't let the measurements fool ya!

2. Make sure it sticks halfway in, and halfway out.

3. Now place your photo onto the nail while you hold the ruler upright. Then carefully float your photo into place on the wall. Two hands help here, one to keep the ruler up & on the pictures hardware, and the other to make sure your picture doesn't go flyin.

4. Almost done! Position the picture where you love it, and hold the ruler firmly against the wall with one hand.

5. Carefully remove the picture, keeping the ruler firm in place on the wall. Use your free hand to push the nail in with your thumb, as best you can. This exact nail will not be holding the photo, this nail just makes the marks for a future nail.

6. Gently remove the ruler, and keep your eye on the mark you made. Circle it in pencil if you have to, though it should be pretty easy to find.

7. Hammer a new nail into the mark you just made, and hang your picture up. It should hang exactly where you had the photo floating before, perfect!

8. Continue for your whole project. This is PERFECT for gallery walls.


Done! In just 45 minutes I had my Marilyn Monroe String Art hanging on the wall. To think, that was actually the fastest part of this Marilyn Project...

Just for fun, here's an angled shot of the piece, focusing on my baby desk redwood.....

You know what's crazy? Look at this thing, it's a cutting from one of our many redwoods here, and it's been alive in this vase for a MONTH! I know! You go lil fella...I just keep changing the water. I bet it will root....

I just love it on my desk though. I'm the type that has to have plants everywhere!
Oops - off topic - so there you have it. The tried and true picture hanging tip really works, and I highly recommend you try it. Thanks for stickin' with me to the end here, you're a trooper.
Have fun!
-Jesse
No comments:
Post a Comment